Guest Post | Ann-Marie Espinoza
I've been scrapbooking since my junior year of college and although my passion for it has waxed and waned over time, I've never lost my love for the hobby. After working in the scrapbook industry for several years in addition to scrapbooking on my own time, I definitely burned out and needed to take a breather from paper crafting to fully appreciate it again. Thankfully I've been feeling the pull to jump back into the hobby again and I couldn't be more excited about it! I've missed playing with paper and am so happy to be reunited.
Here are some of my recent pages, made with Amy's new line, Better Together (which is now restocked at Scrapbook.com and Simon Says Stamp!):


Last year I started a 9 x 12" Messy Book album for my daughter and have been periodically adding pages whenever the mood would strike. When it came to this layout, I knew I wanted it to be a page about all of Briar's new words, but I didn't have a particular photo in mind. I didn't worry about that, though. Instead, I focused on playing with all the fun Better Together patterned papers and embellishments and then adding the image at the very end.
TIP: Try putting the bones of a layout together BEFORE you choose your photo. As long as you leave enough room for a picture, it's super fun to change up the normal order of scrapbooking!


This past New Year's Eve, my husband and I took our one year old to an awesome children's museum in Pasadena called Kidspace for a "Noon Year's Eve" balloon drop. It was such a cool experience for all three of us that it made putting this page together a breeze! Before I started, I applied Tim Holtz yellow distress ink to the background paper using both a blending tool and a polka dot stencil by Heidi Swapp. Yellow is my favorite color and I love the way it added to the already cool watercolor patterned paper! Once I had my photos glued down, I had a blast using embellishments from the Better Together and Stitched lines.
TIP: Try scrapbooking events that you're excited about instead of worrying about working in chronological order. It helps to build momentum and keep you creatively energized for future layouts!
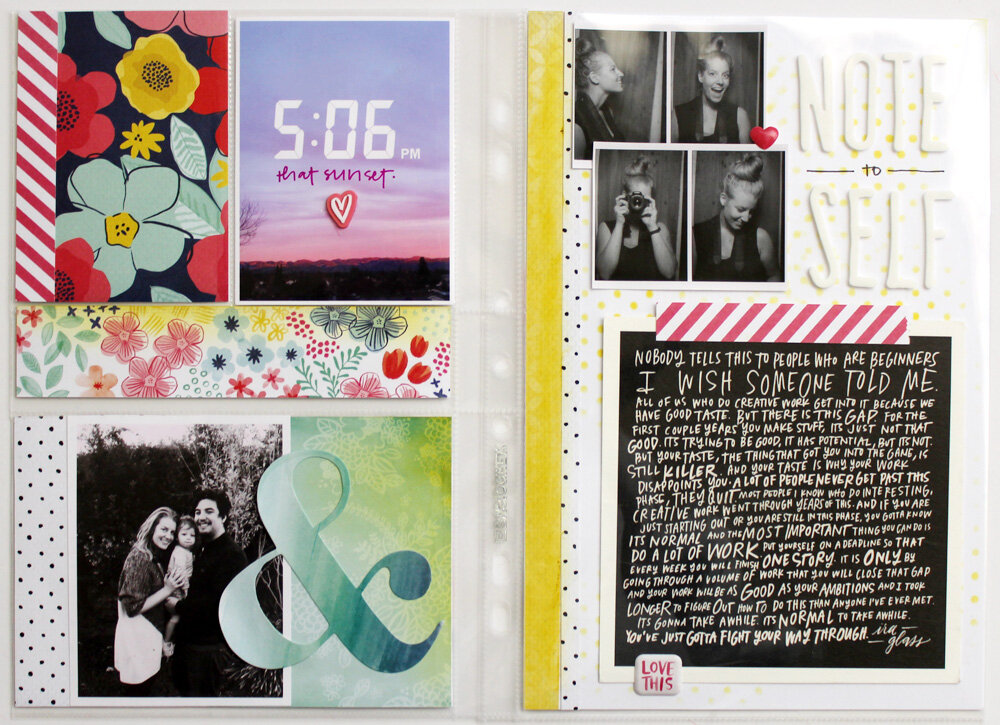
This year I decided to make another "Project Life-style" album (using BasicGrey's Capture album + page protectors) that will act as a landing place for all the everyday photos and memorabilia that I collect throughout 2016. I didn't make an album last year and I felt that I was really missing that big picture perspective on life that weekly / biweekly scrapbooking can offer. I'm only a few pages in, but I'm already having such a great time filling up my album!


For the first spread, I pulled together some of my favorite patterned papers, Thickers, embellishments, photos, and a cool Ira Glass quote postcard to fill up two different page protectors.
TIP: Use all different kinds of photos in your albums...Instagram, DSLR, Snapchat, photobooth, etc. The wide range of styles will help to round out the documentation of your life story, plus it keeps the process exciting!
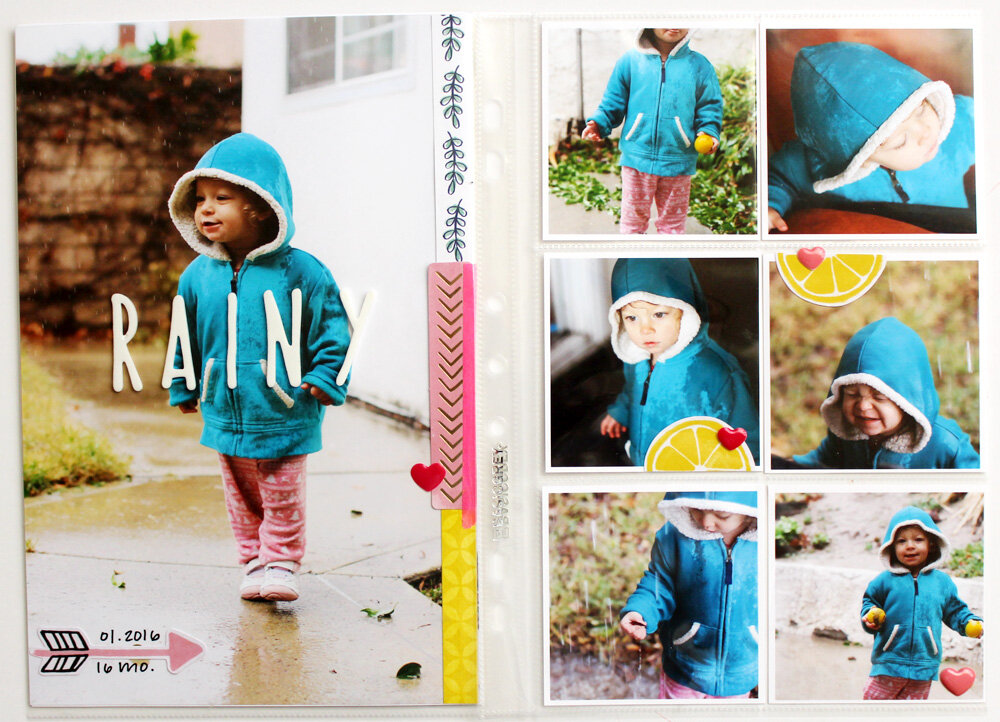

For the second spread, I highlighted a fun morning that my daughter and I enjoyed while playing in the rare Southern California rain. I took a bunch of adorable photos that day, so I chose to highlight my favorite image on the left by printing it large enough to fill the whole page protector and then printing the rest of the images at 3 x 3" each to fill up the six pocket page. Since I wanted the photos to be the central focus of the spread, I only used a few embellishments and utilized one of my favorite techniques: adding a large title over the center of a picture.
TIP: Don't feel like big life events (birthdays, holidays, weddings, etc) are the only milestones worthy of double page spreads. Highlighting the smaller -- but equally important! -- moments should be celebrated in a big way!
Follow Ann-Marie: BLOG | INSTAGRAM | TWITTER | FACEBOOK
Thank you SO much Ann-Marie - loved all the projects and tips and that Briar is just the cutest! You can find Better Together (hurry, it just got restocked) at Scrapbook.com and Simon Says Stamp.