
Sewed Minialbum by Olennka
I need to admit that I love minialbums. I love to create them, collect them and finally after a while browsing page by page. It’s great idea to gather more photos in one place. Now I can see that it was worth to make lots of minialbums. Nowadays my son – he’s three – is viewing my albums and keep asking questions about photos, places and dates. It’s great fun spending time with him in that way. Well, you can say there is lot of work in such an album, it takes more time than scrapbooking page. I don’t think so. I want to show you how easy it can be. You don’t even need lots of supplies, just basic stuff.
Here’s the list of supplies which I used: Amy Tangerine Plus One papers, Amy Tangerine embroidery set, Photos, Scissors, Ruler

When you’ve got all it’s time to start. I’ll explain everything in simple steps.

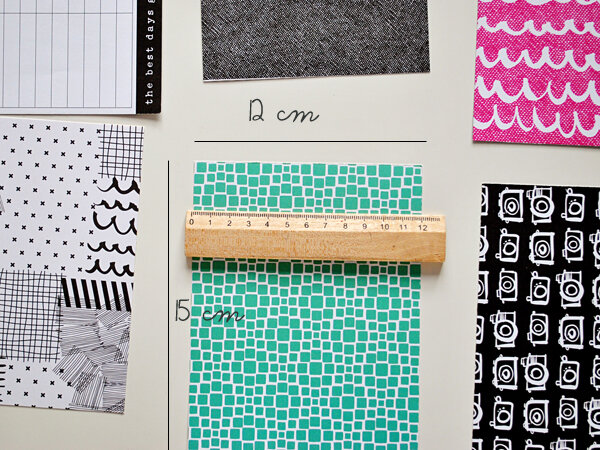
Step 1: Cut papers to size 12 cm* 15 cm ( I had photos 10*15 cm and I wanted to use them as individual pages for my album).

Step 2: Fold each paper as on the picture. I divided each piece for 2 cm fold 10 cm wide/ 15cm high
Step 3: Make holes with paper piercer every 1 cm on each piece of paper on the fold area.

Step 4: Arrange your photos and add titles, embellishments and whatever you like.

Step 5: When your pages are ready sew it together. As you can see it’s quite simple. And here’s my whole album.


I encourage you to try this!!! Hope you like it and have fun! Ola
What a fantastic little book! Shop for Plus One at your local scrapbook stores and online at Scrapbook.com and Simon Says Stamp!