
DIY Silhouette Sign (and Free Cut File!)

As much as we love when people drop by, the number of knocks on our doors from uninvited people has been pretty high lately. It happens at random times throughout the day, but seems to be when Jack is napping. My desire to open the door for a stranger who may have just woken up my child is at an all time low, and the dogs going crazy doesn't help the situation either. I searched Ace and Home Depot and the simple signs they had just didn't cut it. I decided to make my own and share it with you.

First, I designed a cut file in Silhouette Studio and formatted it to my liking.


Next, I loaded a roll of white vinyl into my Silhouette, adjusted the cut settings accordingly, and let the machine work it's magic.

Once the design was cut out, I peeled off the layer of vinyl around my design.
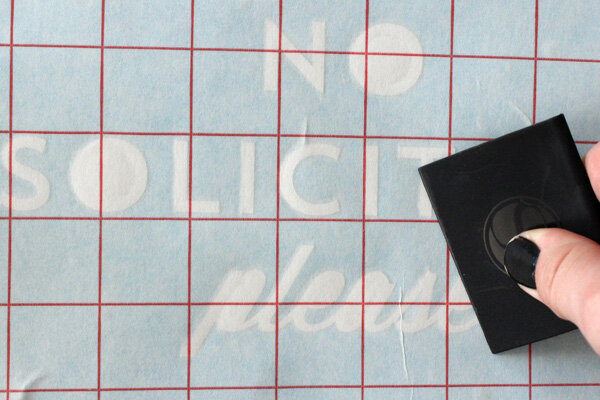
From there, I took my roll of transfer paper, peeled it apart, and placed the gridded portion over the design. Using the scraper tool, I smoothed the transfer paper over the design as best as I could.

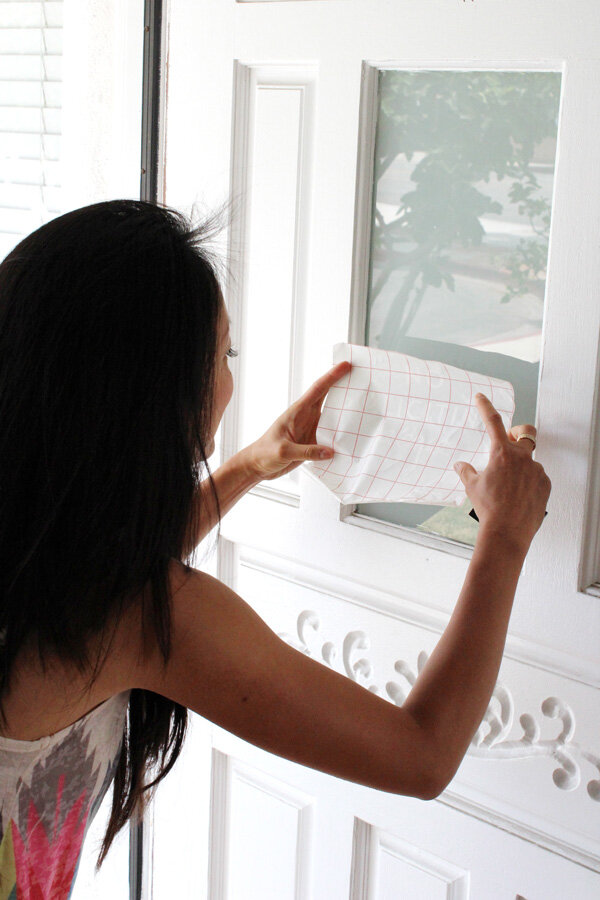
After cleaning the window, I carefully pulled off the sticker paper backing and placed the transfer paper where I wanted it to go. We were laughing at my stance as I was trying to make sure it was completely straight.


Using the scraper tool, I rubbed the stickers onto the window as I slowly peeled back the transfer paper.

So happy with the finished product! Simple, to the point, and polite.
Just a friendly reminder that my newest online class, Here & There Inspiration with tons of tutorials and paper projects starts tomorrow!

In case you missed the new promo video, check it out here.