
DIY Halloween Costumes

Hopefully, you were able to catch the Facebook live video where I demoed three super cute kids costumes for Halloween in collaboration with our friends at Primary. We love Primary for their colorful and super soft basics, and they make Halloween DIY super easy and affordable. Kids can be anything they want! Jack decided he wanted to be a Love Robot with rainbow powers, so we made that happen. Primary is the only kid's clothing brand to offer an awesome DIY concierge service where customers can call in about any DIY/how-to inquiry - they can call or text 1-833-DIYEASY. Primary concierge we will be available through the end of October: M-F 9am-10pm EST, Wkend 10am-6pm EST!
If you want a step-by-step walk through of this unique love robot, you’ve come to the right place. I still recommend checking out the video on Facebook because it’s always nice to be able to see a craft come together in real time. Here at the studio, we’re constantly figuring out the best ways to bring you guys the tutorials and videos you want to see, so be sure to give feedback. Do you like the live video format?
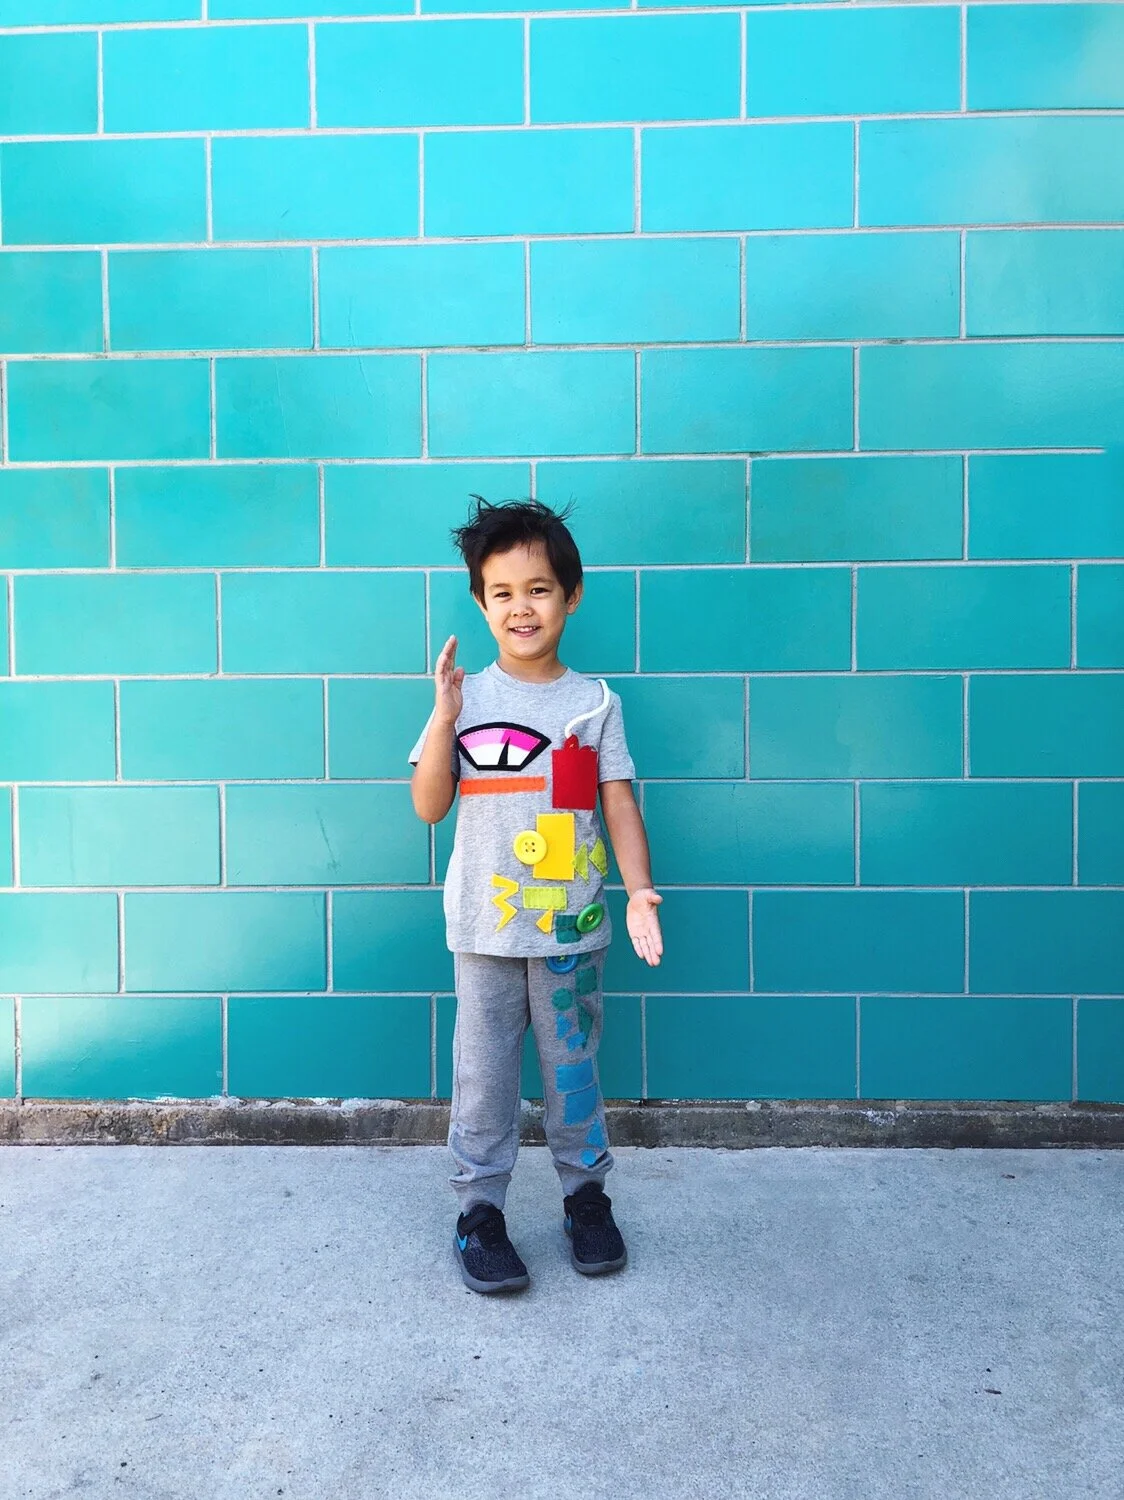
The Love Robot
What you will need:
Plain Gray Sweatpants (I used Primary’s awesome basics because they’re soft, comfy and some of Jack’s favorites)
Felt cut into various shapes (try to imitate buttons, gears, anything robotic!)
Thin Cardboard
Needle (Large)
Embroidery Floss (Various Colors)
Step 1: Cut out buttons, gears, and any other shapes you think will look good for the robot. You can use the thin cardboard to make a pattern and then trace it out on the felt or you can freestyle. Either way, remember, it doesn’t need to look perfect. This is a love robot after all.
Step 2: Lay out the felt shapes on the clothing and style. Figure out where you would like the pieces to fit together on the shirt and pants.
Step 3: Secure the felt by gluing it down with the fabric glue. If you like, outline each felt piece with simple stitching using the needle and felt.

The Rainbow (This can be a solo or bff costume)
What You’ll Need:
Thin Cardboard
Felt in rainbow colors (red, orange, yellow, green, blue, purple and white)
Needle (Large)
Embroidery Floss
Step 1: Create your rainbow by drawing and cutting out cardboard pieces in the shape of half a rainbow. Remember, you should have 6 pieces. I also traced and cut out a puffy cloud. These cardboard pieces will be your pattern and your guide for the felt pieces.
Step 2: Cut out the felt on appropriate colors and lay it out on the clothing. (Optional: if you’re doing the BFF version of this costume, you’ll need to cut out two of each color.) Once you’ve laid out the rainbow felt pieces, place the cloud at the base of the rainbow.
Step 3: Glue and stitch. Carefully glue the pieces in place and allow them to dry. If desired, stitch around the outline of each color.
The Avocado
What You’ll Need:
Thin Cardboard
Step One: cut out two pieces of brown felt (one light and one dark). If you would like to give your avocado a face, make sure to cut those shapes out in the darker felt color.
Step Two: glue down the larger piece and then the smaller on top of it.
Step Three: Finish your avocado off with some cute stitching.
Remember to let all of the glue dry on all three projects before wearing. It takes several hours to allow the glue to dry completely. Here’s the YouTube video sharing some of the finishing touches we put onto the
What are you or your kids going to be this Halloween and are you going the DIY route?
Get 20% off your first order at Primary.com.
This post is in collaboration with Primary, all ideas and opinions are my own. As always, my creative partners and I appreciate the support.